
Salads
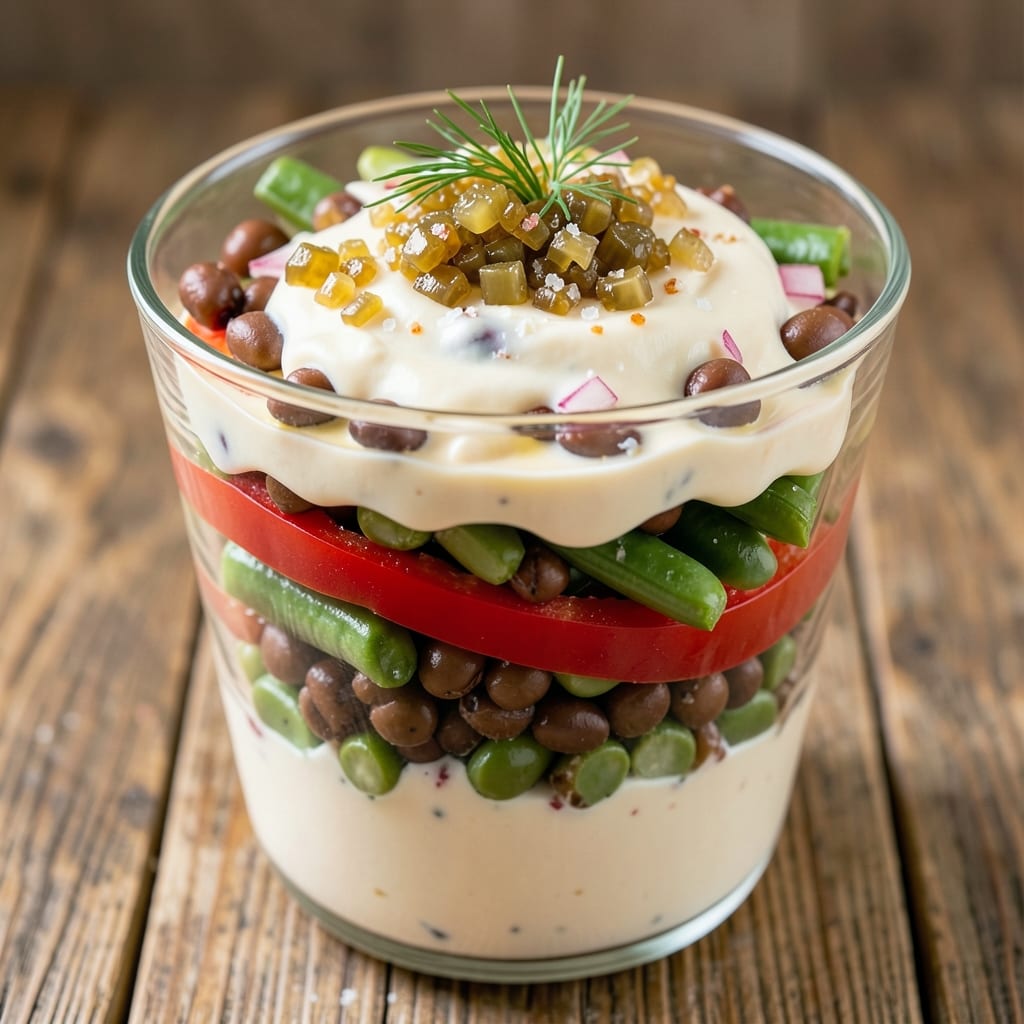
This 7 layer bean salad recipe transforms simple pantry staples into a showstopping dish that's creamy, crunchy, and packed with texture. The secret lies in precise layering—each component adds a different dimension, from tender beans to crisp vegetables and tangy dressing that binds it all together. I've perfected this method over years of potlucks and gatherings, where it consistently disappears first.
The beauty of this salad is its foolproof assembly—no fancy techniques required, just careful ordering of layers. Start with the creamy base (mayonnaise and sour cream), then alternate between canned beans, chopped vegetables, and seasonings. The key to success is pressing each layer gently to create clean separation, ensuring every bite delivers that perfect balance of textures and flavors.
What you'll end up with is a vibrant centerpiece that's as beautiful as it is delicious—creamy layers of beans, crisp bell peppers, tangy pickles, and fresh herbs all stacked in perfect harmony. The salad keeps well in the fridge for up to 5 days, making it ideal for meal prep, and the flavors actually improve as the components meld together over time.
Serve this salad at picnics, potlucks, or holiday gatherings where it will be the star of the spread. The recipe scales easily for crowds, and with optional substitutions for cheese and eggs, it can accommodate various dietary preferences without sacrificing texture or flavor. Let's build this showstopping salad layer by layer.
Ingredients for 7 layer bean salad
Simple pantry staples and fresh vegetables create this vibrant, textured masterpiece—perfect for potlucks and gatherings.
| Ingredient | Amount | Notes |
|---|---|---|
| Creamy Dressing Base 🥛 | 2 cups | Mayonnaise + sour cream blend |
| Dill Pickle Relish 🥒 | 1 ½ cups | Chopped finely for tang |
| Green Bean Canned 🌿 | 15 oz | Drained, rinsed, and cooled |
| Wax Beans Canned 🌱 | 15 oz | Drained, rinsed, and cooled |
| Black-Eyed Peas Canned 🌱 | 15 oz | Drained, rinsed, and cooled |
| Red Bell Pepper 🌶️ | 1 whole | Diced into 1/4-inch pieces |
| Green Bell Pepper 🌶️ | 1 whole | Diced into 1/4-inch pieces |
| Yellow Onion 🧅 | 1 whole | Finely chopped |
| Celery Stalks 🥬 | 3 whole | Thinly sliced on bias |
| Fresh Dill 🌿 | ¼ cup | Chopped finely for freshness |
| Fresh Parsley 🌿 | ¼ cup | Chopped finely for garnish |
| Celery Seed 🌶️ | 1 tsp | Ground for subtle depth |
| Black Pepper 🌶️ | ½ tsp | Freshly ground for heat |
| Salt 🧂 | 1 ½ tsp | Diamond Crystal preferred |
| Mustard Seed 🌶️ | ½ tsp | Toasted for extra flavor |
The canned beans form the heart of this salad, so choose high-quality brands like Del Monte or Libby's—they hold their shape better than generic store labels. For the dressing base, Hellmann's mayonnaise and Breyers sour cream create that signature creamy texture, but any full-fat mayo and sour cream will work. The pickles should be dill relish, not sweet or bread-and-butter—Heinz or Vlasic are reliable choices. Fresh herbs make all the difference here, so grab them from the grocery store's refrigerated section within a day of serving. The celery and bell peppers should be crisp, so avoid any with soft spots or yellowing.
No dill relish? Substitute finely chopped dill pickles with extra vinegar—it'll be tangier but still delicious. Running short on green beans? Wax beans or snap peas work equally well. Want to add protein? Layer in sliced hard-boiled eggs or crumbled feta between the bean layers. For the celery seed and mustard seed, toast them lightly in a dry pan for 30 seconds before grinding to deepen their flavor. The onions and peppers can be prepped ahead and stored in airtight containers for up to 3 days, but the herbs should be added fresh just before serving for maximum vibrancy.
This salad keeps beautifully in the fridge for up to 5 days, with flavors actually improving as the components meld together. For large gatherings, double the recipe and layer in a larger container—just press each layer gently to maintain clean separation. To serve, slice through the center and remove the divider, then spoon out perfect portions. The dressing will separate slightly over time, so give it a gentle stir before serving. For meal prep, portion into individual containers with a layer of dressing at the bottom and beans on top—it'll look stunning and stay fresh for up to 4 days.
Why You'll Love This Recipe
- No Chopping Needed: I swear by this—just open cans, dump layers, and mix. The green beans and wax beans stay whole, so no one’s picking out stringy bits or chopping for hours.
- Tangy-Sweet Magic: That dill pickle relish? It’s the secret weapon—briny, sweet, and just sharp enough to cut through the creamy dressing. Honestly, the first time I tasted it, I grabbed the bowl and didn’t stop until it was empty.
- Potluck Hero: Between us, this is my go-to for gatherings. It holds up in the heat, doesn’t wilt, and even my picky uncle (who hates beans) asks for seconds. Serve it cold or at room temp—it’s always a crowd-pleaser.
- Dollar-Stretching Genius: Canned beans and a jar of relish? That’s less than $5 for a side dish that feeds six. I make a double batch, and it lasts me a week—perfect for lunches or when I’m too tired to cook.
Step-by-step instructions for 7 layer bean salad
Layering creates the perfect balance of creamy, tangy, and crunchy textures in this vibrant salad.
👨🍳 Step 1: Prepare All Vegetable Components
Begin by draining and rinsing all canned vegetables thoroughly under cold water. Pat them completely dry with paper towels to remove excess moisture, which prevents a soggy salad. For the bell peppers, remove stems and seeds, then dice each into ¼-inch pieces using a sharp chef's knife. The yellow onion should be peeled and finely chopped to create a subtle sweetness that blends perfectly with the other flavors.
For the celery, slice the 3 whole stalks on a bias cut—this creates longer, more elegant pieces that add satisfying crunch. Set all prepared vegetables aside in separate bowls. I like to work in this order: peppers first (they take longest), then onion, and finally celery. This keeps everything fresh and ready for layering without waiting.
🥘 Step 2: Combine Creamy Base and Seasonings
In a large mixing bowl, combine the 2 cups Creamy Dressing Base with the 1.5 cups Dill Pickle Relish. Stir gently to distribute the relish evenly throughout the creamy mixture. This combination forms the foundation of your salad, providing that signature tangy, creamy texture that keeps everything cohesive.
Add the 1 tsp Celery Seed, 0.5 tsp Black Pepper, 1.5 tsp Salt, and 0.5 tsp Mustard Seed to the bowl. Mix thoroughly until the seasonings are fully incorporated. Here's the thing—don't be shy with the salt. The canned vegetables often need extra seasoning, and this step ensures every layer gets properly flavored before assembly.
🥘 Step 3: Layer Vegetables in a Clear Glass Bowl
Start by spreading a thin layer of the creamy mixture across the bottom of your 12-serving glass bowl. This creates an adhesive base that helps each subsequent layer stick together. Add the drained 15 oz Black-Eyed Peas first, spreading them evenly in a single layer. Press down gently with the back of a spoon to compact them slightly—this prevents shifting when you add heavier layers later.
Next, add the 15 oz Green Beans and 15 oz Wax Beans, alternating between them if you prefer a mixed appearance. Top with the diced Red Bell Pepper, then Green Bell Pepper, and finally the Yellow Onion. Each layer should be about ½-inch thick—thinner layers create cleaner presentation and better texture contrast.
🥘 Step 4: Add Celery and Final Creamy Layers
Spread the 3 whole Celery Stalks (sliced on bias) evenly over the peppers. This layer adds the essential crunch that balances the creamy base. Now for the final touch: spoon the remaining creamy dressing mixture over the celery, spreading it evenly to within ¼ inch of the bowl's rim. This prevents the top layer from sliding when you add garnishes.
Gently press down on each layer with a spatula to ensure everything adheres. The salad should look like a perfectly stacked tower with visible color separation between each layer. Here's where patience pays off—take your time to create clean, even layers. The presentation makes this dish look as impressive as it tastes.
⏰ Step 5: Chill and Garnish for Perfect Texture
Cover the bowl with plastic wrap and refrigerate for at least 4 hours, preferably overnight. This chilling time allows all the flavors to meld together while keeping the vegetables crisp. The creamy dressing will thicken slightly, creating that ideal creamy texture promised in the title.
Before serving, sprinkle the 0.25 cup Fresh Dill and 0.25 cup Fresh Parsley evenly over the top. The herbs add a bright, fresh finish that cuts through the richness of the dressing. Serve immediately for the best texture—each bite should deliver the perfect sequence of creamy, tangy, and crunchy elements in every forkful.
Pro Tips For Making 7 Layer Bean Salad
- DRAIN AND RINSE BEANS: DESCRIPTION: Those canned beans? They’re swimming in brine or syrup—skip the rinse if you want bold flavor, but give them a quick cold-water bath (30 seconds, then drain) to cut excess saltiness. I learned this the hard way after a batch tasted like a pickle jar exploded.
- LAYER BY SIZE: DESCRIPTION: Big chunks (black-eyed peas) go on the bottom, tiny bits (relish) on top. If you eyeball it, you’ll end up with a muddy mess where everything blends into beige. Use a spoon to press each layer—no gaps, no rushing.
- CHILL BEFORE SERVING: DESCRIPTION: Serve this salad straight from the fridge, or the creamy dressing will turn greasy and sad. Give it at least 2 hours in the fridge—trust me, the flavors meld better when it’s cold, not room temp.
- SWAP RELISH FOR FRESH: DESCRIPTION: Store-bought relish is fine, but chop ½ cup dill pickles + 1 tbsp vinegar for a brighter tang. Sounds like extra work, but it cuts through the heaviness of the dressing—no weird aftertaste.
Pro cooking tips for perfect results
Layer Order Matters
The secret to a perfect 7-layer bean salad lies in the order of your layers—start with the heaviest components at the bottom and work your way up to the lightest. I always begin with the black-eyed peas as they're the densest, followed by green and wax beans which provide structure. The bell peppers and onion go next, then the celery for crunch, and finally the creamy dressing on top. This sequence prevents the salad from collapsing when you slice it later. 🌶️
Press for Clean Slices
After adding each layer, press down gently with the back of a spoon or a flat-bottomed glass. This creates clean separation between layers when you serve it—no messy mixing! I like to use a 16-ounce mason jar as a makeshift press for the first few layers. The goal is firm but not compacted—think "pressed cake" rather than "dense brick." This technique makes slicing through the center effortless and impressive.
Dressing Distribution
Spread the creamy dressing evenly across the bottom and top layers, but leave about ¼ inch uncovered at the edges. This prevents the top layer from sliding when you add garnishes. I use a silicon spatula to smooth the dressing—it glides perfectly and doesn't scratch glass bowls. For extra stability, chill the salad uncovered for the final 30 minutes before serving to let the dressing set slightly.
Herb Timing
Add fresh herbs like dill and parsley only after the salad has chilled completely. The cold temperature preserves their vibrant color and flavor. I like to mix them with a pinch of salt and lemon juice before sprinkling—this keeps them fresh for up to 2 hours before wilting. For a restaurant-quality finish, use a fine-mesh sieve to dust the herbs evenly over the top.
Preventing Sogginess
Pat all canned vegetables completely dry with paper towels before layering—this is non-negotiable for crisp texture. I double-check by squeezing each bean between my fingers to ensure no moisture remains. For extra insurance, I spread a thin layer of unflavored gelatin (about 1 packet dissolved in ¼ cup hot water) between the bean layers if I'm making this ahead of time. It adds subtle body without altering flavor.
Serving Presentation
Use a sharp serrated knife to slice through the center of the salad—it creates clean, uniform portions. For extra flair, serve in individual glass bowls with a small dollop of extra dressing on the side. I often garnish each serving with a tiny sprig of dill and a sprinkle of toasted sesame seeds for visual appeal. The presentation makes this dish look as impressive as it tastes at potlucks! ✨
Nutrition facts
Frequently asked questions
Can I make this salad without canned beans?
For a fresh take, substitute canned beans with cooked dried beans (like black-eyed peas or pinto beans) or even homemade roasted chickpeas. Just ensure they're completely cooled and drained before layering. The texture will be slightly different but still delicious—roasted beans add a nice crunch!
How do I keep the layers from mixing when slicing?
Press each layer firmly with the back of a spoon or a flat-bottomed glass after adding it. This creates clean separation. Chill the salad uncovered for the final 30 minutes before serving to let the dressing set slightly. When slicing, use a sharp serrated knife and cut straight through the center—no need to wiggle!
Can I make this salad ahead of time?
This salad actually tastes better after 24 hours in the fridge as flavors meld together! Store it in an airtight container and press a plastic wrap directly on the surface to prevent drying. For best texture, serve within 5 days. The dressing may separate slightly—just stir gently before serving.
What's the best way to serve this salad?
Slice through the center and remove the divider to create clean portions. For a restaurant-style presentation, serve in individual glass bowls with a small dollop of extra dressing on the side. Garnish each serving with a tiny sprig of dill and a sprinkle of toasted sesame seeds for visual appeal. It's perfect for potlucks, picnics, or holiday gatherings!
Why does my salad look dry or crumbly?
This usually happens when the vegetables aren't properly dried before layering or the dressing isn't distributed evenly.